993 detail
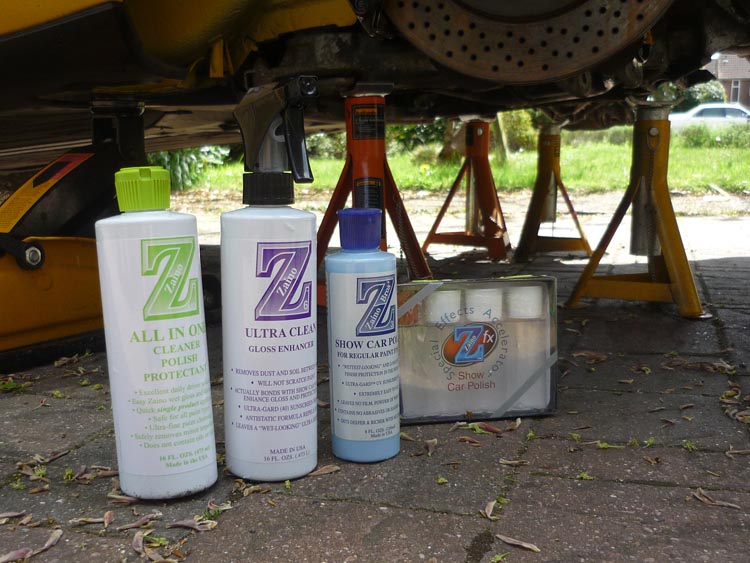
Detailing is all the rage in the UK. Whilst some of the results that can be achieved and that you can readily read about on the web are pretty gobsmacking, there is a side to it that is just a tad embarrasing. Some of the techniques are so exhaustive and exacting that the line between perfectionism and behavioural disorder becomes a big foggy. Some of the names and the branding of the products can have a real kiddies sweet shop mentality about them and any half decent 'detail' is by definition multilayered so at least to your neighbours, it will appear as if you have obsessively polished your car 17 times all in one day. Last year though I had my 968cs professionaly detailed by one of the UK's premier outfits Drive n Shine. As well as a machine polished paint correction to remove scratches, they protected the paint with a multilayered sealant system manufactuered by Zaino. That was 10 months ago now and I have to say that the results have been hugely impressive. The car has been so easy to clean in that time and the protection has lasted ages. Even now, the car is extremely easy to wash and barely needs proper shampoo let alone hot water. I've never been into washing cars and have been pretty hopeless most of my life, just using the local jetwash for the most part. I have always had the odd bottle of AutoGlym something or other stashed away but have never really known how to use it properly and have never even had a proper shampoo or chamois to wash & dry the car correctly in the first place. My experiences meant that I was sceptical of any finish lasting and any car not drying to anything better than a nasty, dusty, fairy liquid induced haze with tons of dirt still left behind. The results of the 968 spoke for themselves. So my experience with Drive N Shine got me interested in the whole world of detailing and at the start of 2009 I began to buy and test a few of the products that the pro detailers really rate. I quickly found that the highly rated products do indeed work incredibly well. Fancy names, over complicated instruction, heavy marketing & branding or not, some of these products will stun you at just how effective they are at doing their job, especially if you are used to basic Halfords-esque gear. So when I got the 993 I wanted to give it a go myself. I decided stick with the Zaino system that had been used on my 968 and also to try to correct the paint a little (by hand as I dont have a machine polisher). Along the way of course I got completely sucked into the process and as you'll see I ended up cleaning places that many 911 owners will never even look at let alone wash and scrub. It's important to point out though that many of these areas won't be revisited anytime soon; i just wanted give my 993 the best possible start by being as clean and protected as possible. More protection means more beading, less dirt will accumulate, less standing water, less chance of rust and a car that is easier to clean from here onwards.
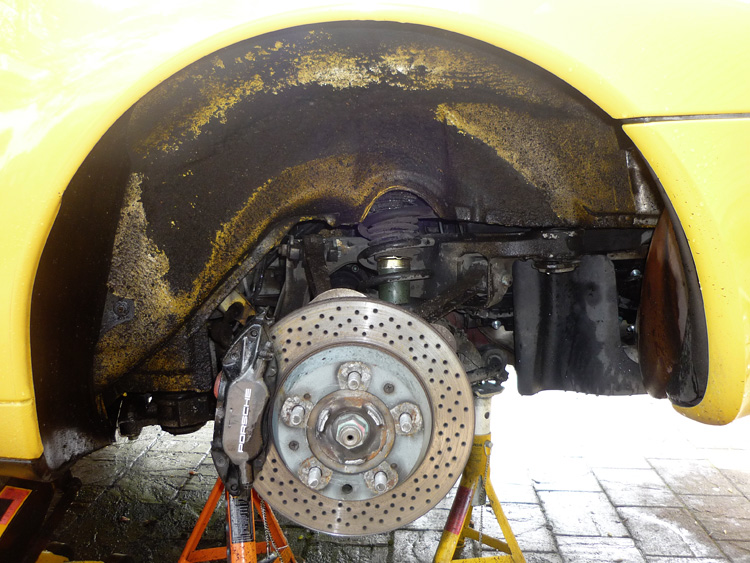
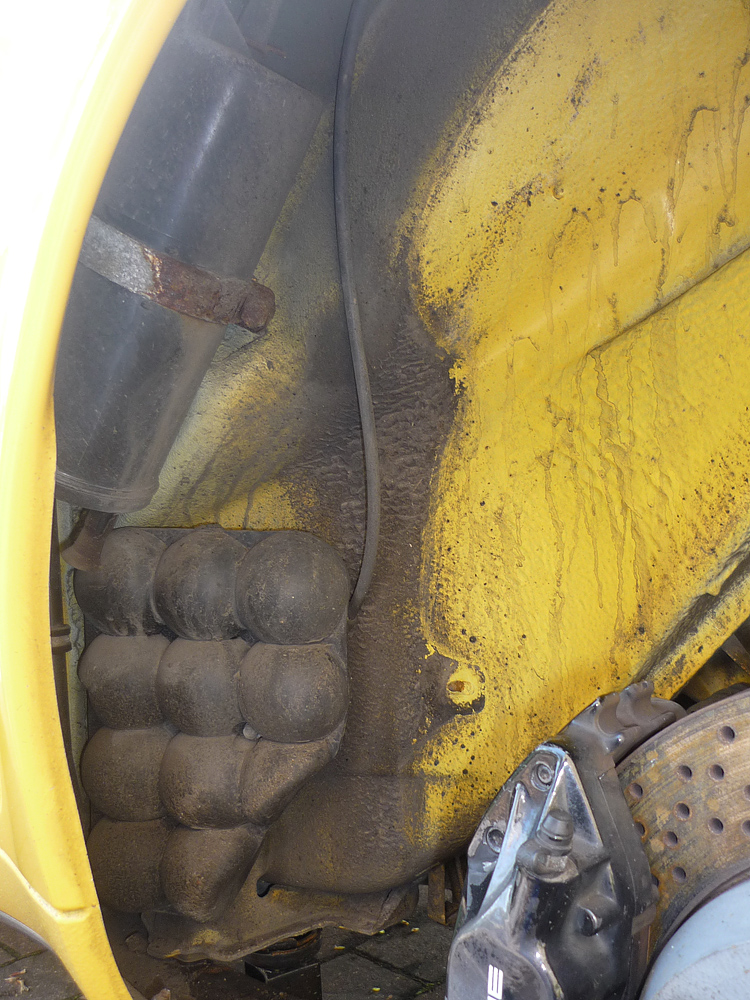
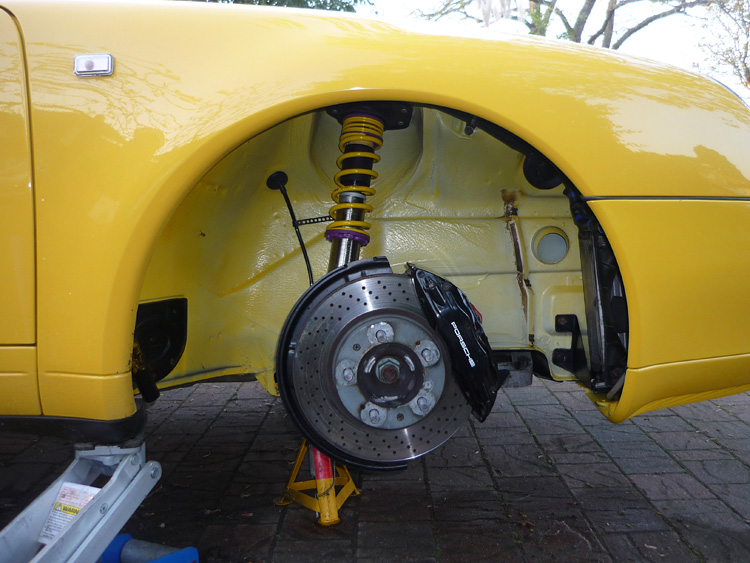
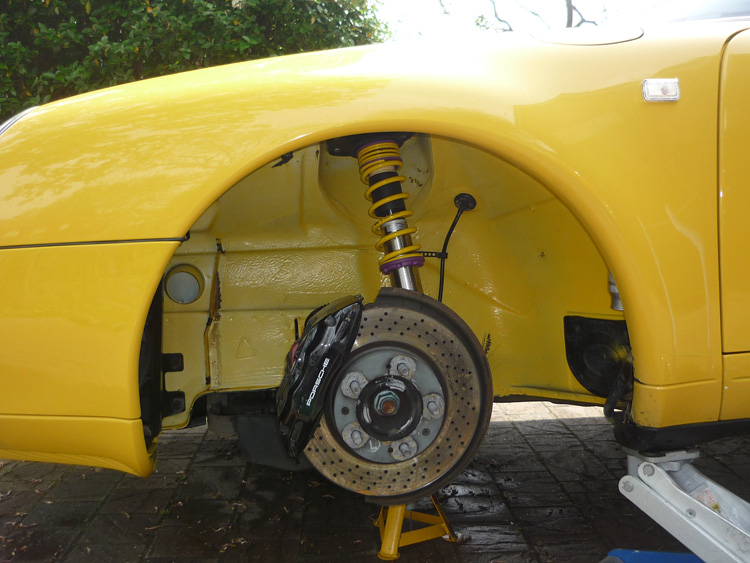
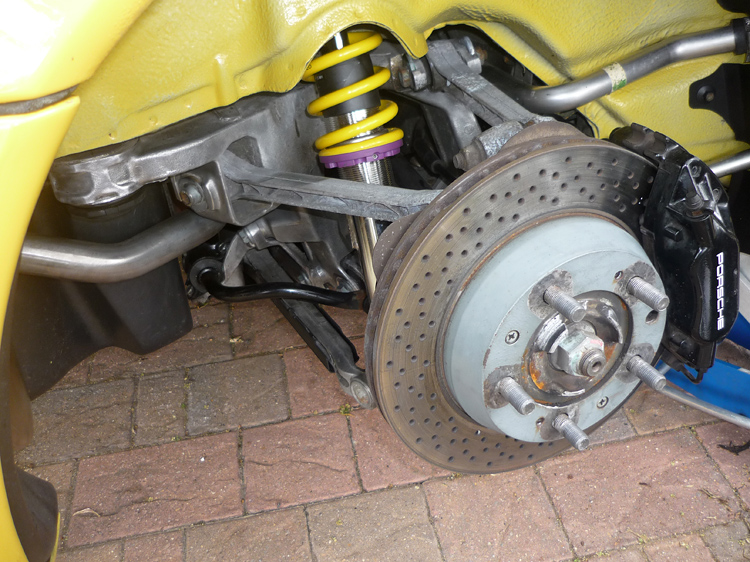
WHEELARCHES As I checked and upgraded all my suspension I cleaned the arches first of all. The liners had to come off (some screws were rusted and had to be clamped with pliers then twisted out) and then it was a long and drawn out elbow grease process removing 13 years of baked on grime.
First the arches were rinsed and allowed to soak for 10 mins. After this they were rinsed again and scrubbed hard with a very concentrated solution of fairy liquid and soap. The above picture is after a first soak and scrub. Yes, they started out a fait bit more grubby than this but sadly I forgot to take a true 'before' picture.
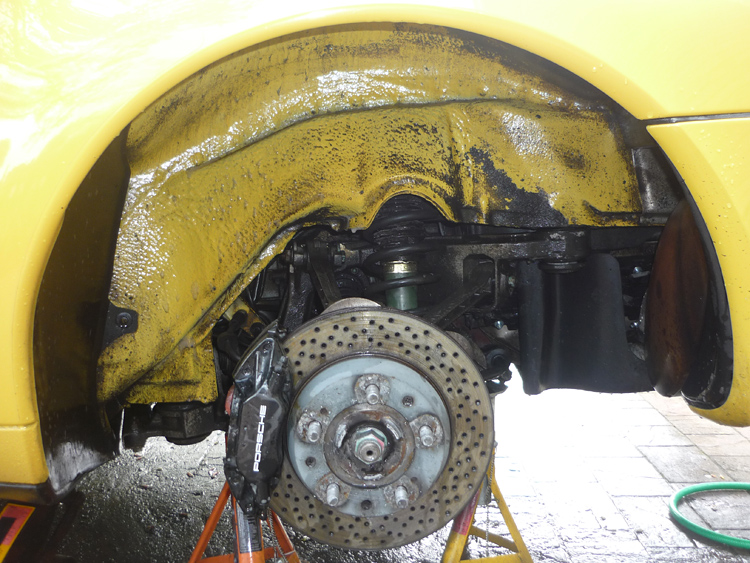
After this they were rinsed again and then sprayed with Bilberry wheel cleaner. Bilberry is an amazing alloy wheel cleaner and I strongly recommend that you grab some and push whatever you currently use aside - it truly is one of the wonder products that has shaken the detailing world to the core ! In addition though, it's suprisingly good at shifting thick caked on layers of grim. The mud and dirt in these arches was sometimes almost a centimetre thick.
After soaking with Bilberry then more hard scrubbing they came out like this. Getting there but now covered in a myriad of tar spots. I used a basic tar cleaner (turtle wax I believe) as its all I had to hand. Autosmart TARDIS is one of the best products if you wish to get something decent. I used my fingernail a lot to take the head off each of the larger spots of tar. I had to scrub very hard and soak the tar remover on first. Another key was to use a fresh abrasive microfibre cloth that really worked some friction onto the surface.
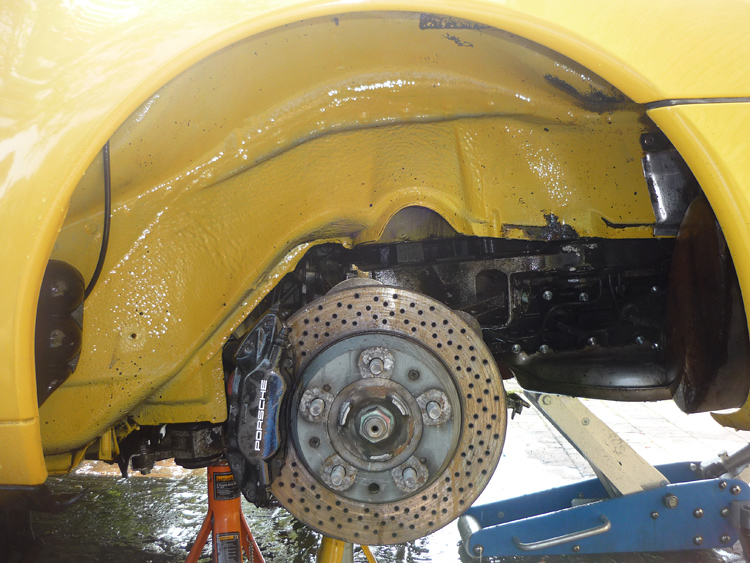
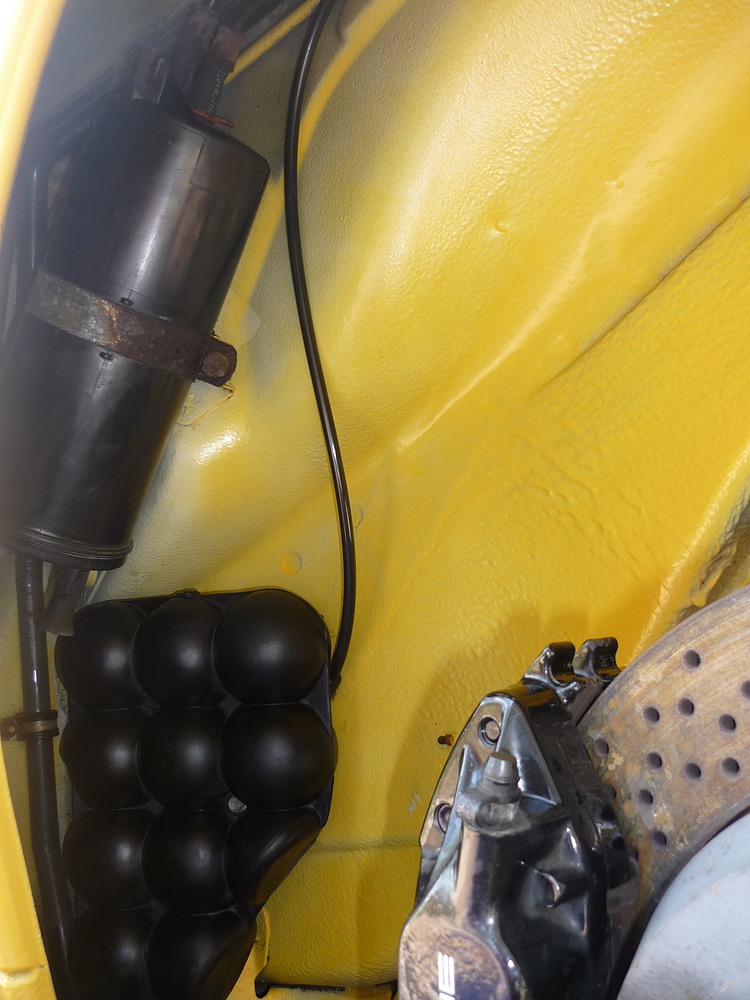
Here's how the 4 arches ended up after much hard graft:
Much like the bodywork (as you will see), I prepped the wheel arch surfaces with Zaino Z-AIO. This is an all in one polish, cleaner and protectant. It removes any unwanted oils and prepares the surface for the application of the Zaino sealants. After the Z-AIO had dried and been buffed off, I applied 3 layers of the Z3 sealant for single stage paint. I had mixed this with the additive ZFX which allows you to apply 3 layers all in the same day (makes it dry quicker) and also makes it cling better in the first place so its ultimately more durable. So with 4 layers of Zaino we shall see how well the arches hold up. Certainly they should in theory stay well protected for at least 6 months, possibly more, and if I do elect to clean them at any stage it should be a doddle.
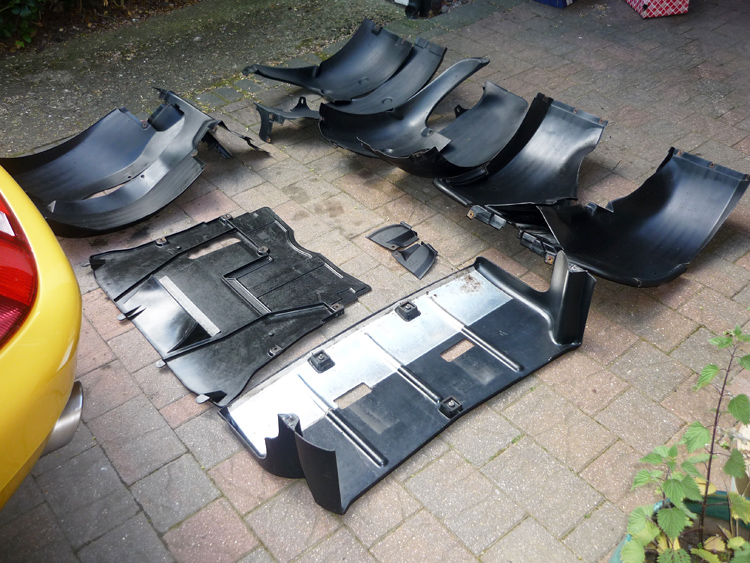
Gearbox and engine undertrays, wheel arch liners all cleaned with bilberry and then dressed with a great product called 303 Aerospace Protectant. 303AP gives a very natural looking finish and is about the best thing you can use for rubber and plastic.
WASH, CLAY, BEHIND LIGHTS AND HIDDEN AREAS To prepare the main bodywork I first gave the whole car a regular wash with Autoglym bodywork shampoo using the 2 bucket method and a proper lambswool mitten. If you don't know what the 2 bucket method is then do a quick google because it really is the only true safe way to clean your car. After drying with a regular large drying towel I clayed teh whole car. Claying is one of the easiest and most dramatic things you can do to your car. A few years ago it seems nobody had ever heard of the process and I was sceptical to say the least, but the results are very impressive especially if your car is fairly old. Once its been clayed using a suitable lubricant (the quick detailer in my case) the paint will feel as smooth as glass. If you only take one thing away from this page... make sure that you try out clay on your car !
Before getting into the main bodywork treatment I also wanted to treat all the hidden areas of the paintwork and get those out of the way. Also the front bumper needed to have tar and bugs removed. I did this with a mixture of tar remover but also Autoglym super resin polish, partly because i'd decided not to properly polish the front and rear bumpers later on as I considered it overkill. Autoglym SRP contains fillers so it would conveniently fill any scratches in my bumpers as well. Inside the light housings I continued to apply Autoglym SRP to clean, fill scratches and provide a mild polishing/shine. After that I applied a wax called Finish Kare 1000p. This is a new wax that seems to be all the rage at the moment with many of the experts. It has proven itself to be very durable, lasting 6 months or more and giving excellent beading and protection from water. Its easy to apply as well as its just one coat and then buff off when dry.
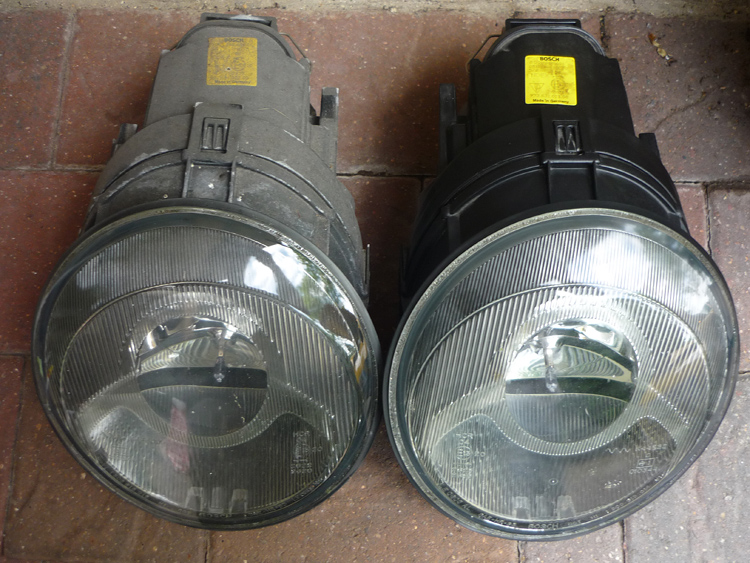
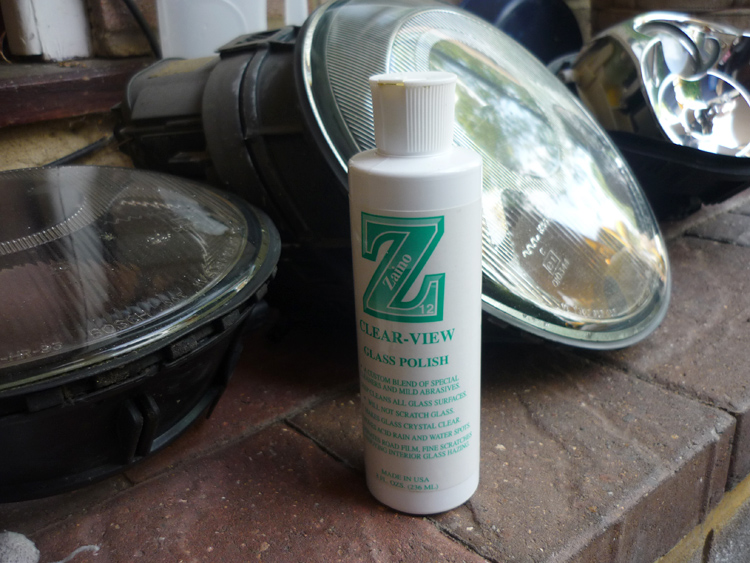
Front lights and indicators removed and cleaned and dressed with 303 Aerospace Protectant. All lenses cleaned with Zaino Z12 glass polish.
Front light units removed and taken apart. Inside and outside of the lenses cleaned with Zaino Z12 glass polish. Silver reflectors were given a gentle dust down. The outside of each headlight unit was cleaned and dressed with 303 Aerospace Protectant.
Headlight housings were washed then polished/cleaned with Autoglym SRP and then waxed with Finish Kare 1000p to help prevent standing water.
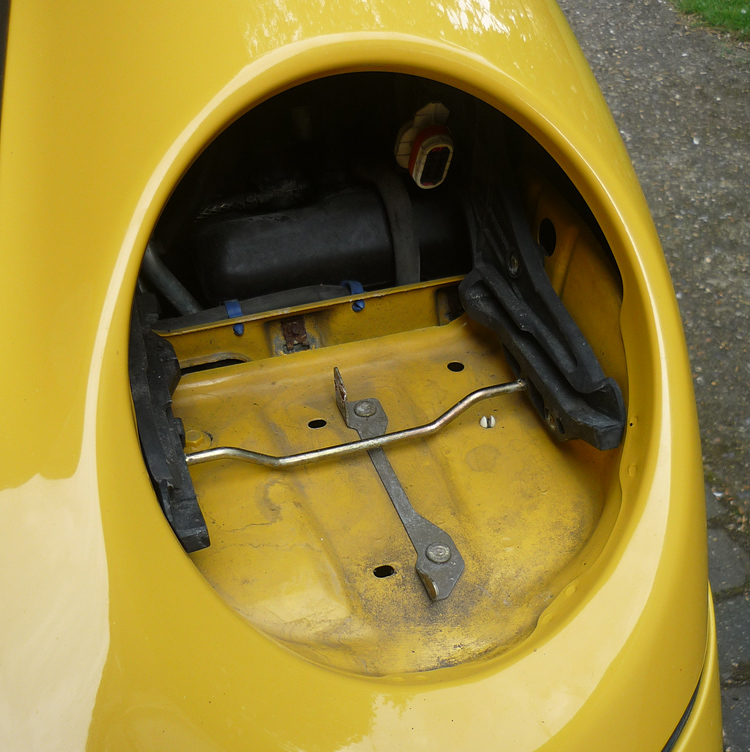
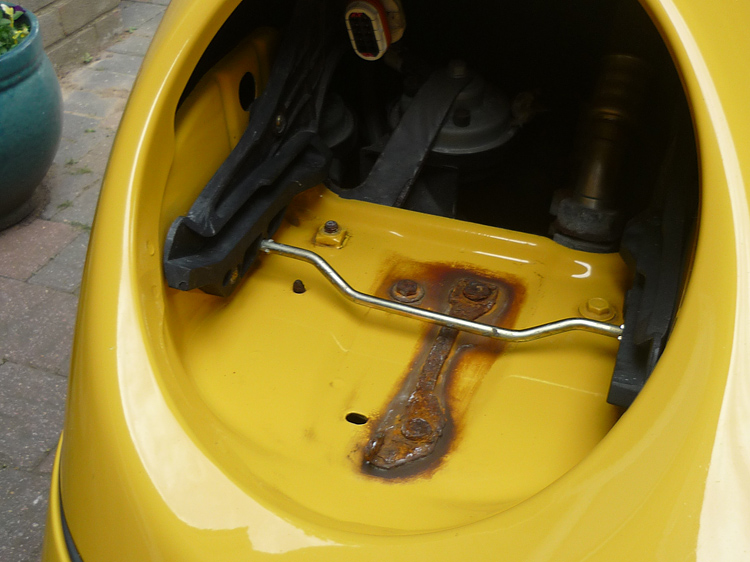
Here you can see a headlight guide bracket which has completely rusted over. Water has got in here and festered. This just shows that treating and protecting the paint in these hidden areas can only be a good thing. I will be replacing this bracket just as soon as I can order a new one from my Porsche dealer.
This is the front lip of the front bumper where it meets the boot. I Lifted up the black plastic trim cover and there was a lot of grime there. This was cleaned away and then the hidden paint was cleaned with Autoglym SRP then finished with FK1000p. I also cleaned and dressed the plastic trim piece with 303 Aerospace Protectant.
All the surfaces and black pvc, plastic and trim around the spoiler and engine area were given the same treatment. Clean paint surfaces with Autoglym SRP, protect with FK1000P. Clean and protect rubber and plastic with 303 Aerospace Protectant.
POLISH, CLEANSE & SEAL I didn't want to take this to the stage where I was investing in a machine polisher. However I felt that before putting on all those layers of sealant I'd be silly not to try and reduce any paintwork scratches and swirls even just a little bit. Whilst products like Autoglym Super Resin Polish primarily act as a filler, filling in scratches with substances that at some stage (5-10 washes) will get washed away again and allow all the blemishes to return, I wanted to use the permanent solution of a proper abrasive polish. After seeking advice and finding this great little tutorial on the web I settled on using a medium cut Menzerna polish by hand. This was hard work. I rubbed with very form pressure on a 1.5 by 1.5 foot area at a time for 4 minutes or more. And then after completing the car I went round and did most of the panels again. The paint still has scratches present but I was more than happy with the improvement. The menzerna really does work without an expensive machine polisher but you do have to put in the elbow grease. Speed Yellow paint hides its swirls really well in any case and they are almost impossible to see unless the sun is out full strength and you are looking directly at the centre of its reflection in the yellow bodywork. After the Menzerna intensive polish, I went back over the car with a very fine finishing polish to give a slightly sharper look. With all these products and processes its worth bearing in mind that the cloths, applicators and means by which you apply and remove substances are AS important as the products themselves. You have to have a good range of clean cotton applicator pads, foam applicators and suitable microfibre cloths. If you attempt to apply and remove all your different potions with one dirty old rag then forget it. The polish for example deamds to be used with a large foam applicator. If you try and use 2 or 3 finger underneath a rag, trust me your fingers will ache so badly after 5 minutes or so that you'll barely even be able to finish one panel.
Swirling greatly reduced. Luckily the day I polished the sun was out so it was fairly easy to see improvement.
After the polishing was complete, I gave the bodywork a wipedown with Zaino's quick detailer Z6. This just helps remove any left over polish residue and prepare the paint for the application of the Z-AIO.
Much like the arches, Z-AIO is first applied all over the entire body. It contains very mild abrasives (which won't really matter here as we have just polished the car properly), cleansing chemicals and is also a sealant and will give the car a good glossy shine. It will remove any previous waxes or cleaners that were on the car and It is also the perfect base layer for any of the powerhouse Zaino sealants. After a proper polish, it is the perfect base layer to the zaino system. After 45 minutes when it has fully dried it can be wiped off and then you can get started with the sealant. Now without getting into every nuance, the main zaino sealants which are surely the flagships of the entire product range (Z3, Z2 and Z5) can be reapplied or layered after 12 hours or so, but by using the ZFX flash cure additive you can layer them 3 times in just a few hours. And 3 or 4 layers is what you really want for ultimate durability. If you were to apply only one layer of Z2 or Z3 then it's kind of missing the point and the real unique selling point of the Zaino range. In addition to this quick drying function, the ZFX additive also increases the bond that the sealant makes with the paint so from a durability point of view it really is the way to go. All you do is mix in a few drops with your sealant in a separate container.
Another layer of Z3 waiting to dry.
ALLOYS For the wheels I used my usual 5:1 dilution of Bilberry wheel cleaner, rinsed then dried and then applied some Z-AIO as a base layer inside and out and also to act as a mild polish on the clearcoat. On top to finish I used the very durable FK1000P wax. Now you may think that polishing wheels is a bit bonkers but trust me, it makes cleaning them so much easier; for a while they won't need any alloy wheel cleaner, just some cold regular car shampoo mix and then a quick wipe with a soft brush. Brake dust will not be able to bind and really burn in and this is something you want to avoid because when you get those really ingrained black spots they can be impossible to remove.
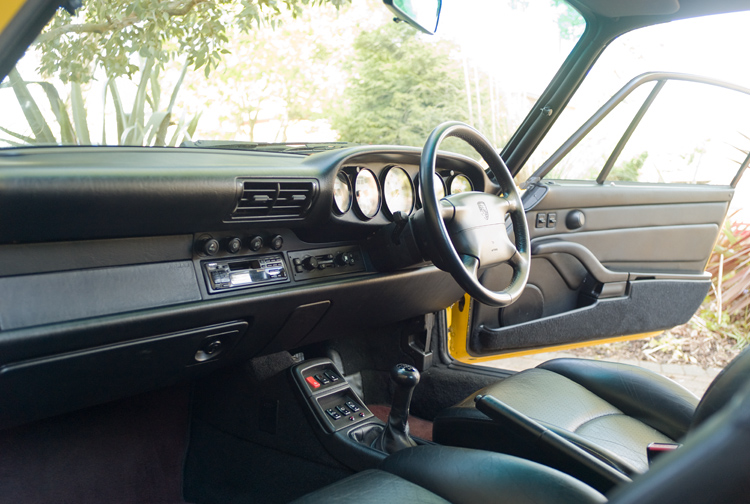
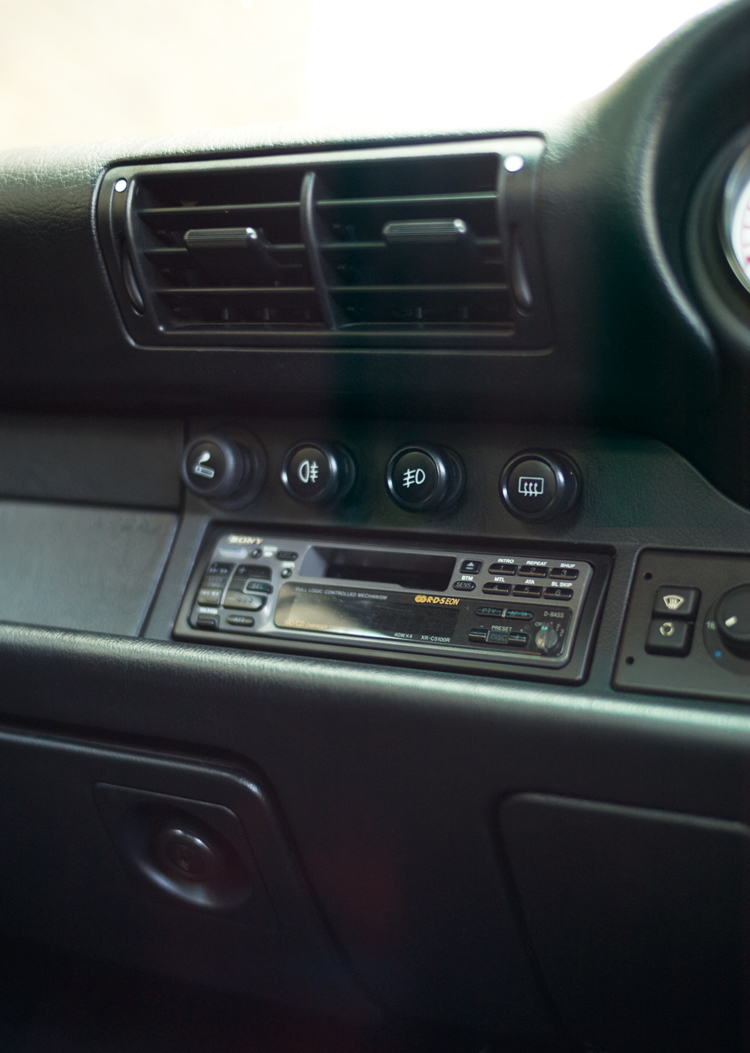
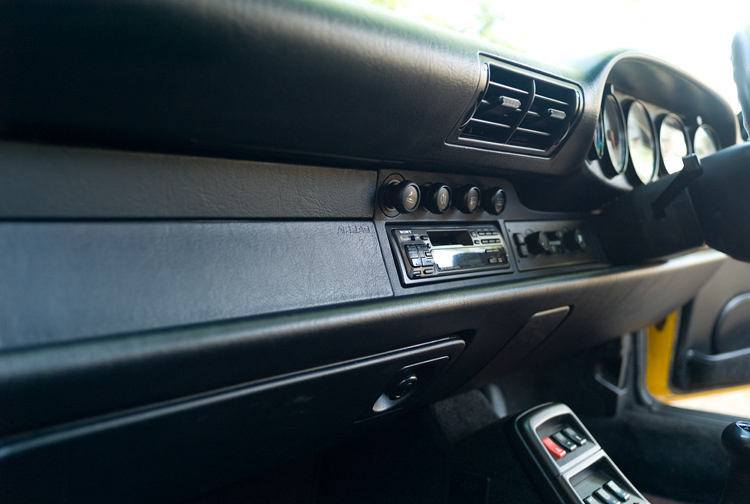
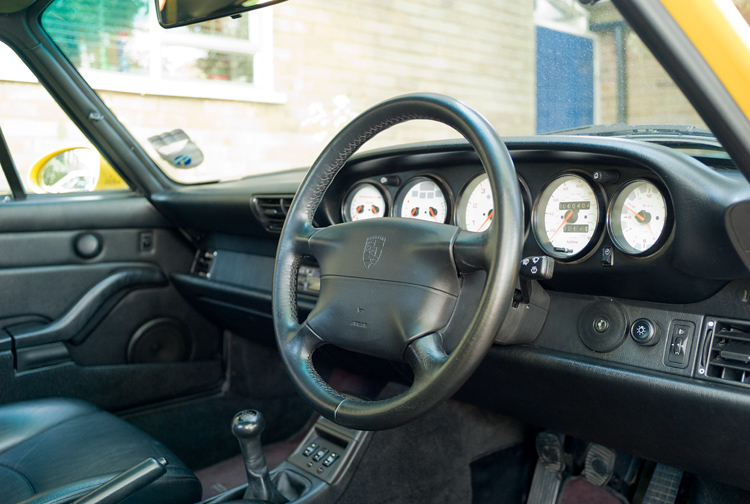
INTERIOR The inside of my car didn't need much of a clean. But i did dust it down and give it the usual hoover. Also some of the surfaces, rubber trims and vinyl coverings were treated with 303 Aerospace Protectant. The 993 dials also have rubber surrounds and to get to these properly I actually removed the dials and then ran the rubber edges through a cloth soaked in 303AP. And in case you're wondering, here is a very useful guide how to achieve this. When reassembling, just make sure you follow the trick of putting the rubber trims back in first and also coating them with a little soapy water. The leather didn't need much work but I used regular Gliptone cleaner and conditioner.
FINISH
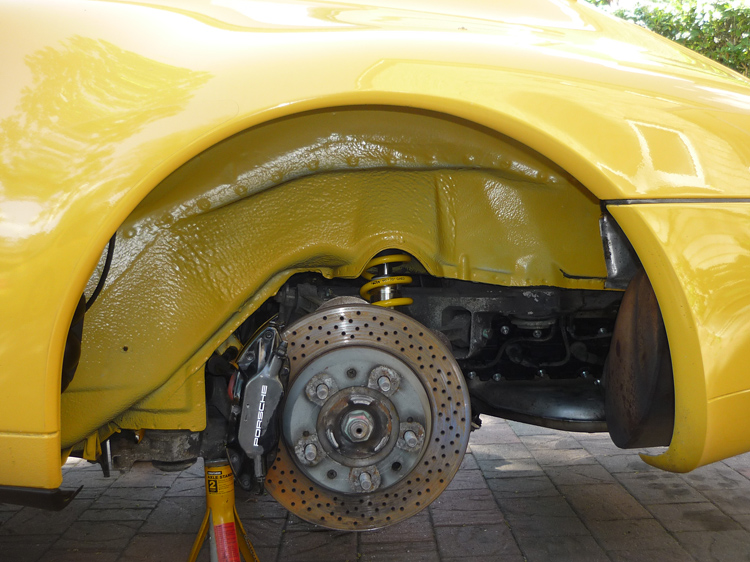
EASY TO WASH ? Ok, so she is not completely finished. I have to start on the engine next. But for now, the car is very well protected for at least 6 months or so. Since all of this I have washed it twice now and it is so easy and takes minutes. I don't need to use the 2 bucket method and don't need to use a mixed bucket of regular car shampoo. All I do is coat the car with a light pre-rinse foam from a foaming gun that's attached to the garden hose with standard hozelock connection, wipe away the dirt, rinse and dry. To perform this first part I use the Gilmour Foamaster . 'Super Spray' make a similar but much cheaper item. These types of sprayers are designed just for pre-washes - to soak your car so the grime is loosened in preparation for the main bucket and mitten wash. But with the zaino on there I don't need to get into all that. With the Gilmour I just spray on the foam solution over the bodywork and rims, let it sit there for a few minutes then just wipe it off with a mitten in one hand and have fresh water from the hose rinsing in the other hand. That's it., car cleaned ! I just have to make sure that I soak the mitten in a bucket of cold water every so often to wash away any grit that it has picked up (as per the 2 bucket method). With the Zaino applied, water beads very well, dirt does not stick to the paint so comes off extremely easily. Drying is made quicker too as a sheet of water slowly poured from an open hose will take most of the droplets away leaving very little left over water to dry off. The wax on the alloys also works amazingly well so far. Water beads extremely well and after a cold spray of snow foam , a quick agitate with a soft detailing brush and then a rinse and they are done ! No need for any heavy duty alloy wheel cleaners or scrubbing with thick bristles and discarded toothbrushes.
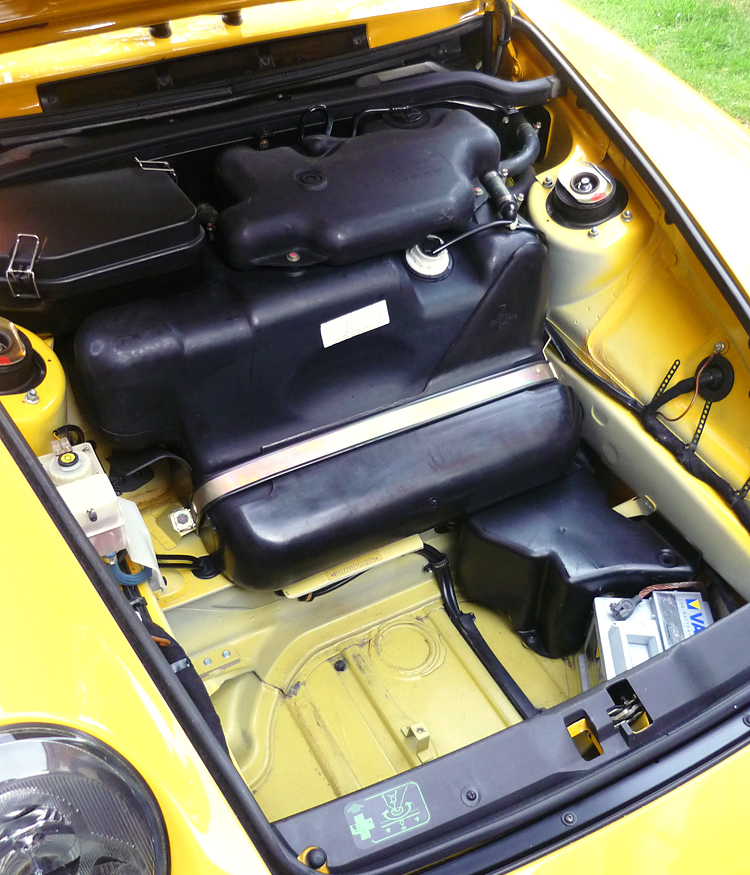
ENGINE DETAIL TO FOLLOW SOON
|
||
.jpg)
.jpg)
.jpg)
.jpg)

.jpg)
.jpg)
.jpg)
.jpg)
.jpg)
.jpg)
.jpg)
.jpg)
.jpg)
.jpg)
.jpg)
.jpg)

.jpg)
.jpg)
.jpg)
.jpg)
.jpg)
.jpg)