HOWTOBUILD a H.
Development stills | Completed Shots | Press STills | 3D World interview | CGI Magazine story
Download The Showreel | Full Credits | HOME | The Jackals Forge
All images and movies presented here are fully protected by copyright and registry, and reproduction for purposes other than private & personal use - i.e. modification, distribution, republication, transmission, re-transmission, or public showing - without the prior written permission of www.jackals-forge.com, is strictly prohibited. © 2002 The Jackals Forge, BBC2
3d World Magazine interview
this article appeared in the February 2002 issue of 3d World magazine
One of the signature programs of BBC2’s winter schedules, How to Build a Human is a four-part series that builds on the BBC’s enviable reputation for graphics-based science programming. Unlike a lot of its output in this field though that sees much of the 3D being farmed out to facilities around the country such as FrameStore and 422:Bristol, this one has been completed in-house at the Corporation’s Specialist Graphics department at White City.
The programme examines science’s current knowledge of genetics in what CG Designer & Supervisor Richard Morris describes as ‘an exciting and easy to understand way’, also taking a detour at the end up to the bleeding edge to do a bit of blue-skying regarding medical techniques that currently lurk just over the fringes of possibility.
Inevitably, all that calls for fairly serious amounts of 3D, about 25 minutes worth in Morris’ estimation, with what he refers to as ‘an awful lot’ of standard 2D effects work on top using both Tremor and Inferno. “The cell world which makes up the key signature graphics in the series was designed, built and shaded in a pre stage of R&D over two and a half months,” he explains. “All in all the project consisted of me for 11 months, two other animators for three months each and a third animator for about a month. We also had two 2D compositors working on it for four months.”
It’s a fairly small team, but Morris is an old hand at this sort of project, having previously worked on the original Human Body while at Red and Body Story II while at MPC. As with Body Story II, the majority of the work was accomplished using the industry-standard Maya and Renderman combination.
“For all the cell stuff Renderman was once again the only tool for the job,” he says, “allowing the design to have power, flexibility and strong use of displacement and depth of field , as well as efficient and fast - well, relatively fast - render times. The imagery produced would quite simply be impossible to recreate in the stock Maya renderer. Despite the fact that it doesn’t even have a decent open scene file browser written for it yet and it’s near impossible to cancel a test render, Maya was used for modelling and animation. For nearly all of the geometry Pixar’s Subdivision surfaces were used in vast preference to Maya’s. Here’s to the ever expanding Renderman drop down menu!”

One of the benefits about being something of a veteran in the field is getting more responsibility and freedom on the design side, something Morris has made the most of.
“Apart from a few colour changes here and there, what you see is how I meant it to look,” he says. “Coupled with the fact that the cell graphics were all occurring in one singular environment, that meant I could really develop and hone that cell world to much finer degree. The graphics in Body Story were very mechanistic, explanatory sequences to illustrate the narrative. In How to Build it was decided that the graphics were primarily for emotional purposes as opposed to providing mundane scientific explanations. This in itself meant a lot more scope for drama and fun and ultimately more visual freedom.”
The result is something that, as far as the main cell sequences go at least, is far ahead of what was done in Body Story II. Individual cell elements - chromosomes, organelles and so on - are more complex looking from a displacement, hue and lighting point of view, while the general cytoplasmic medium - the ‘black space’ in which everything sits - was also realised in a more sophisticated manner.
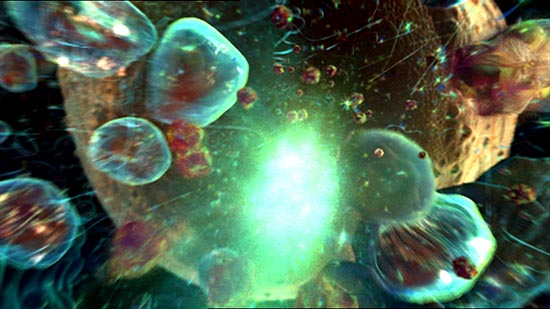
“Although I agreed with the programme makers that one of the key things with the design of the cellular world was to give it a sense of space, it had to be pretty densely packed in there just to stop the black from creeping in too much and making it seem too diluted and bland,” says Morris. “Anyone who has created a scene like this will know that to fill CGI worldspace you have to pack in about 10 times more stuff than you thought you did. As a result, the cell, although nowhere near as dense as a real cell, is in computer terms very, very heavily packed.”
Pre-rendered pictures, .rib boxes and the like were used wherever possible, but that didn’t alter the fact that many shots were processing a tremendous amount of geometry. With most cell elements animating or deforming in some way as well, render times cranked up to approaching eight hours a frame for certain scenes, with the .rib generation taking another forty minutes all in itself. Partly as a result of this, for some of the more traditional live action CG sequences as well as some of the landscape and foetus shots that feature in the production, Morris switched over to the Maya renderer.
“It was preferred for them because firstly it could give the Rman render farm at the BBC a bit of a breather to catch up. It also was useful for raytracing effects, quick procedural texturing, and globally dealing with animated live action plates from a setup and workflow point of view.”
Technically, probably the hardest shot to produce was what Morris refers to as the master Mother cell shot, a zoom in on a colony of around 50 cells through the cell wall and down to the length of a single gene.
“As you get close to the master cell and are about to penetrate it, using pre-rendered cards or backdrops was no longer an option as you have real 3D parallax going on, so I had to crossfade to a pass of the real geometry at some point. But what you are looking at through the cell wall is just an immense amount of cellular material and it’s *all* deforming and subject to animated glow and colour. In this shot you are getting the biggest view of the cell out of all the shots I did so it was impossible to just delete what wasn’t in front of the camera.
Purely from the standpoint of sheer memory and .rib generation time, a clever solution had to be reached to get the frames finished in time. Morris won’t reveal all the techniques used, but one of the keystones was devised by team member Andy Peters who created a utility that split the camera up into 16 smaller cameras without compromising lighting but also removing unwanted geometry and animation. For each frame 16 far smaller and much more manageable pictures were rendered, before being taken in to Nothing Real’s Tremor where a custom macro in Tremor used a careful naming convention to instantly reassemble the pieces into the completed frame.
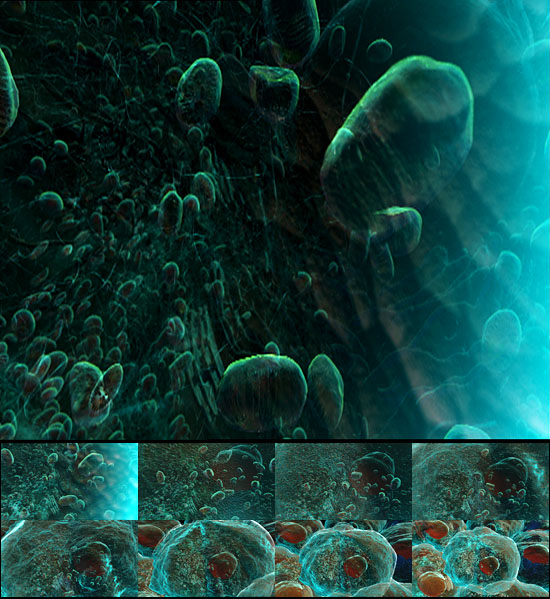
Several new visual features have been added to the cell world depicted in the programme, extending and building on the dynamic shading work Morris implemented with Body Story II. Oscillating hues have been included, and the hue and brilliance of elements can now be linked to various properties of the camera, which can in turn change on the fly. One of the most important features though has been the introduction of messy, chaotic reality into the imagery.
“Other techniques I tried to employ a lot were what I would for fun term ‘anti-3d’,” Morris says. “I have never been a fan of clean and perfect imagery and often try to roughen stuff up in different ways , add mistakes that are perceived more as an indicator of real life as opposed to CGI errors - kind of like the Bayeux Tapestry that had one tiny patch all wrong. Some of this was achieved using some weird displacement effects and this was particularly effective with the atomic DNA shots. No one really knows what a DNA molecule would truly look like but one thing is for certain, if you could image it quite clearly and at decent resolution then it wouldn’t look very clean or perfect. Similarly, I used written devices to flash bits of geometry, alter their shading or lighting on the odd frame here and there and also make floaty particle matter pop, fizz and generally appear alive. Some of the technical purists might see it and think it’s CGI artefacts, but believe me it’s in there on purpose and for good reason.”

For more detail on the project, not to mention the infamous Gallerie Abominatae
and its how not to do 3D pages, head to Richard Morris’ own website:
www.jackals-forge.com
The ingredients list
Upon
completion the master scene file contained:
138,732 nuclear particles
1524 microtubules and microfilaments
1330 cytoplasmic organelles
1088 mitochondrion
400 strands of chromatin
240 mobile proteins
135 membrane proteins
118 double helixes
102 slabs of rough endoplasmic reticulum
70 mobile pieces of messenger RNA
63 sheets of cytoskeleton
43 “X” chromosomes
36 pieces of golgi apparatus
6 bunches of smooth endoplasmic reticulum
4 hero peroxisomes
2 liquid lipid membranes
and 1 “Y” chromosome
(clicking on image leads to 150K large version)
Given that many of the above contained several layers of geometry the
total amount of discrete subdivision poly meshes was something approaching
12-15,000. The scene file was close to the 400mb file size mark.
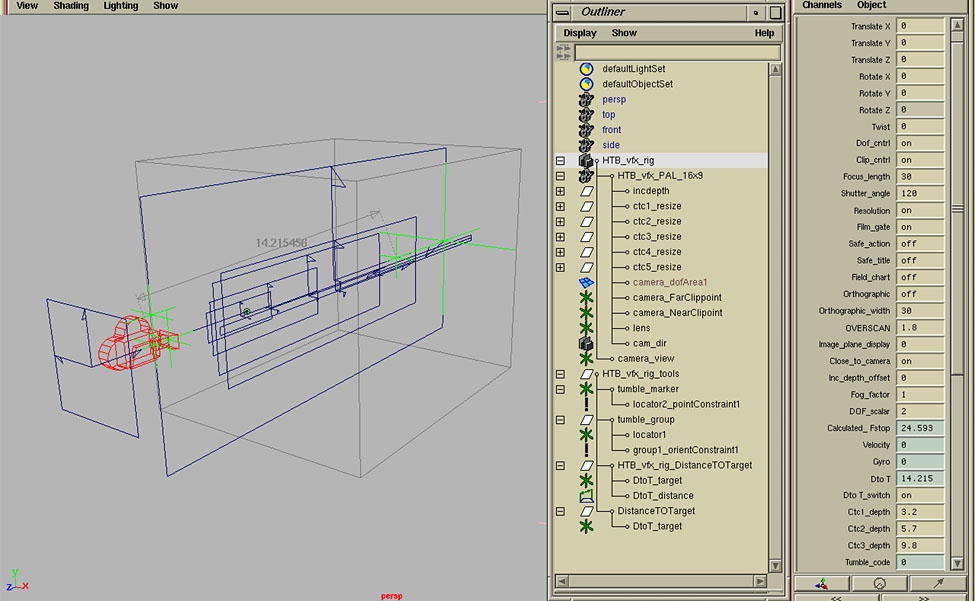
The Camera Eye
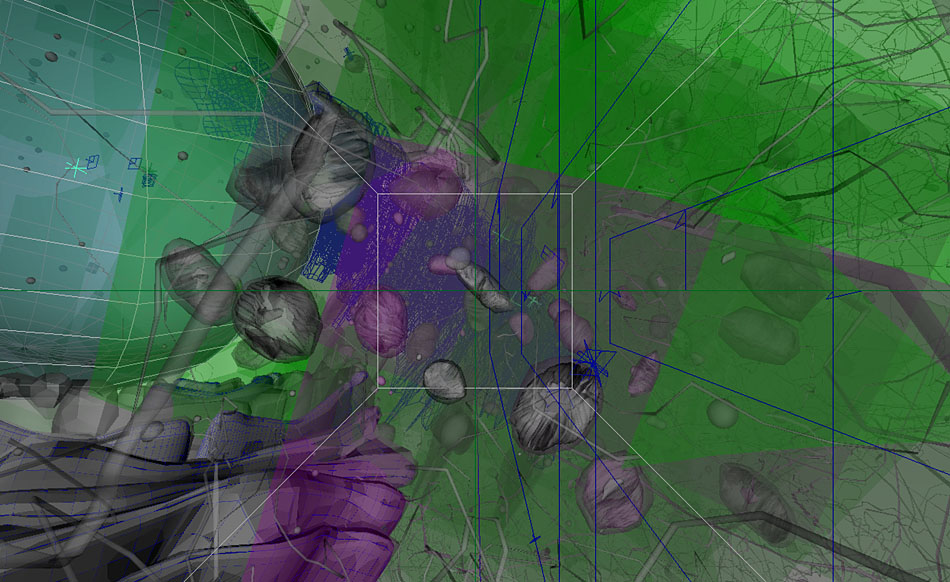
Long a fan of dynamic shaders, for How to Build a Human Morris developed several new properties for the camera within Maya that could be altered on the fly, including a gyroscope expression that outputs a figure to represent the camera’s state of tumble. When linked with the shaders, a pitching or rolling camera will result in changes in shade and lighting in realtime. A similar technique has been used to convey speed; a calculated velocity of the camera causing incandescence to burn and the whole scene to suddenly brighten in response to rapid acceleration.
(clicking on image leads to 121K large version)
Close to camera projection boxes were also used as they were easily resizable and provided easy control of an objectss shading with respect to depth, ie. an element changes colour when the camera gets close to it.
written
by Andy Stout 2002